|
|
|
|
|

|
Pocket telex
PX1000 was a small hand-held message terminal, that was used for creating
and sending text messages over standard telephone lines, using a built-in
acoustic coupler. The PX-1000 was introduced in 1983 by
Text Lite
in Amsterdam and was sold by Philips
(Netherlands) and others.
|
Although different versions of the PX-1000 were sold,
we will concentrate here on the Philips version of the PX-1000Cr,
as it features advanced cryptographic capabilities.
It was intended for small companies and journalists, and was also used by
the Dutch Government.
Furthermore it played an important role in the fight for
Nelson Mandela's release from prison.
The image on the right shows the Philips version of the PX-1000Cr.
The extension 'Cr' is used to identify the crypto-version.
It is shown here with its display up (i.e. with the hinged top lid open).
|
|
|
The intial PX-1000 was introduced by
Text Lite in 1983. It was
capable of sending sending messages up to 7400 characters via
a standard analogue telephone set, using the built-in acoustic
modem. As a countermeasure against eavesdroppers, the text could
be encrypted with the DES encryption algorithm. In 1983,
the NSA expressed its concern about the
availability of the DES algorithm to the general public
and asked Philips Usfa
to implement an alternative algorithm.
During the development of the alternative encryption algorithm
by Philips, an intermediate version of the PX-1000 was sold.
In this version the encryption facilities had been replaced by
a simple spreadsheet. It became known as the CALC-version as
it had a blue CALC-button replacing the standard red CODE-button.
Once the new algorithm was ready, in 1984, the red CODE-button was
re-introduced and the unit became known as the PX-1000Cr
(Cr = Crypto).
Both versions were adopted by Philips
and sold in the Netherlands as PX-1000 and PX-1000Cr.
In 1985, a version with C-Mail capability (but without crypto)
was added to the range. Several other variants,
such as the Family Doctor,
appeared in other countries under different names like Siemens,
Alcatel and Commex.
The PX-1000 was followed by the slightly improved PX-1200 and finally
by the completely redesigned PX-2000.
Text Lite BV went out of business
in 1990.
|
|
|
|
|
|
|
Short messages were stored in the PX-1000's static memory, that was
retained by the internal batteries (7400 characters max.).
Longer messages could be stored on an external audio cassette recorder,
by connecting a short 3 mm Jack cable to the
microphone input of the recorder. They could be loaded back into the
PX-1000, by connecting the same cable to the headphones output of the
recorder and playing back the message.
|
The PX-1000 was fully designed and developed by
Text Lite BV in
Amsterdam (Netherlands) in 1979 and 1980.
The case was designed by company shareholder Hugo Krop [11],
who was also repsonsible for the functional specification of the device.
The actual manufacturing took place at Samwell
Electronics in Taiwan, whilst Text Lite Ltd. in Ireland was
responsible for the the final quality assurance and packaging.
The first units appeared on the European market in 1980.
|
From the outset, the PX-1000 was capable of sending messages
in encrypted form using the DES encryption algorithm, which had
been obtained from the American Bureau of Standards for just US$ 8 [11].
By 1983 however, the National Security Agency (NSA)
in the US became aware of the PX-1000 and its encryption capabilities,
and got increasingly concerned with the DES algorithm being available
to the general public world-wide in such a small and affordable device.
|
The NSA then asked Philips Usfa to implement an alternative algorithm
and see to it that the DES-based units were taken off the market.
Text Lite was told that the alternative algorithm was similar in
strength to DES and their engineers were allowed to watch over the
implementation.
In the meantime, whilst the new PX-1000Cr was developed,
the PX-1000 CALC was sold as an intermediate solution.
It did not support any encryption, but featured a calculator instead.
This version can be recognised by the blue key, marked CALC, instead
of the red CODE key.
|
|
|
The remaining stock of 12,000 'old' PX-1000 units was bought by Philips,
along with 20,000 firmware PROMs that had already been manufactured.
Philips later sold them on to the Americans along with 50 PXP-40 printers,
for a total of NLG 16.6 million (more than EUR 7.5 million) [10].
|
In The Netherlands,
Philips Electronics
had the exclusive distribution rights of the PX-1000 and was
probably the largest customer of
Text Lite BV.
After the NSA had expressed its concern
about the use of DES, Philips Usfa
was asked to implement an alternative encryption algorithm.
|
At the time, Philips Usfa
was heavily involved in confidential
work for the Dutch Government and for NATO and had a
separate division
that had specialized in cryptographic equipment.
As they had already implemented an
NSA encryption algorithm
in their Spendex 40 secure phone,
they had built a good relationship with the
NSA.
Philips Usfa then implemented the alternative algorithm
for the PX-1000, which took place at Philips' head office in
Eindhoven (Netherlands) under scrutiny of Text Lite
engineers who were concerned about possible 'backdoors' [11].
|
|
|
As no backdoors were found, the algorithm was approved for the
new PX-1000Cr. This time EPROMs were used to store the final
program, rather than ROMs. This made it possible to correct minor
mistakes in future releases and have different
software releases
for various customers.
|
Please note that unlike other Philips encryption devices,
the PX-1000Cr was not a product of
Philips Crypto BV.
Instead it was marketed and sold by the ELA Group of
Philips Netherlands
as a consumer product.
According to the instruction manual of the PX-1000Cr [7],
the number of possible cryptographic keys was calculated at a mere
18,446,744,000,000,000,000 (over 18 quintillion).
It would take the fastest computer
thousands of years to break it... [7 p.16].
|
The PX-1000Cr was also used by parts of the Dutch Government during the 1980s.
For official government use however, the Philips software, and hence the
encryption algorithm, was replaced by a proprietary version. This version
was developed by a specialized - undisclosed - agency and contains a secret
encryption algorithm. No details about this algorithm are publicly known.
|
Several different versions of the PX-1000 are known to exist. They were
sold under a variety of brand names, but this was not a simple matter of
rebadging the product, as there are some significant differences between the
various versions. In order to obtain the firmware version number of the
PX-1000, use the following key combination whilst the device is switched on:
In the initial version (1983), the copyright message can be
read by pressing the LIST/PRINT and ON/STOP keys simultaneously.
In later versions, the above combination is used.
This will display a copyright message, consisting of the name of the
year in which the software was released, the name of the manufacturer
and a version number. Globally speaking, there were three different versions.
Thanks to Cees Jansen for explaining the differences between them [1].
|
- Text Tell PX-1000
The standard version was a simple text terminal,
that allowed messages to be entered, stored and transmitted over a standard telephone line. It had built-in DES-based encryption/decyption.
It can be recognized by the red MODE-button.
This version was developed in 1980 and is different
from the Philips PX-1000Cr (see below).
Firmware: COPYRIGHT TEXT LITE 1983 (ROM).
- Text Tell PX-1000 CALC E
In this version, the text encryption/decryption feature has been dropped
in favour of an arithmetic calculator.
It can be recognized by the blue MODE-button.
The packing was modified by sticking an adhesive label over part of the text,
but the image of the PX-1000 with the red button, remained on the packaging.
Firmware: COPYRIGHT 1984 WEST-TEC PX CALC E (EPROM)
- Philips PX-1000
This was basically the standard Text Tell PX-1000 CACL E with the built-in
arithmetic calculator (identical to the one above).
The only difference is the
Philips logo on the
product and on its packaging.
Firmware: COPYRIGHT 1984 WEST-TEC PX CALC E (EPROM)
- Philips PX-1000Cr
This was the Philips implementation of the
cryptographic version of
the PX-1000. The arithmetic calculator was dropped again in favour of
a new encryption/decryption algorithm. This version was not compatible
with the earlier DES-based PX-1000.
Firmware: COPYRIGHT 1984 WEST-TEC PX V2 (EPROM)
- Philips PX-1000 C-mail version
This was an adapted version of the standard PX-1000 that allowed messages
to be sent via C-mail, an early protocol to read SMTP E-mail from the
command-line.
This version has no cryptographic capabilities.
Firmware: COPYRIGHT 1985 WEST-TEC PX CALC H (EPROM)
- Dutch Government version
For use by the Dutch government, a special version of the Philips PX-1000Cr
was used. It contained an improved (secret) encryption/decryption algorithm.
The cryptographic software was not developed by Philips, but by a specialized
government agency.
|
PX-1000 variants were also sold as rebatched products, for example:
|
- Family Doctor (C-mail)
This version of the PX1000 was sold in the USA as an aid to send and read
ECGs (Electro-Cardiograms). The terminal had a
rebatched display panel
with the words 'Family Doctor' at the top.
It supported the C-Mail message protocol
(E-mail via the command-line).
Photograph below courtesy Detlev Vreisleben.
- TELI The Contact
'The Contact' was probably a variant of the PX-1200 that was marketed by
Teli in the UK. As the PX-1200 contains a larger EPROM, the software
supports both crypto (CODE) and calculations (CALC). Calculator mode
is entered by using the key combination C + ON/STOP.
Firmware: COPYRIGHT 1988 WEST-TEC PX1000S/A TELI
|
|
|
|
|
|
|
- PX COPYRIGHT TEXT LITE 1983 (ROM, original version)
- COPYRIGHT 1984 WEST-TEC PX CALC E (EPROM, temporary version)
- COPYRIGHT 1984 WEST-TEC PX V2 (EPROM, new version)
- COPYRIGHT 1985 WEST-TEC PX CALC H (EPROM, C-mail version)
- COPYRIGHT 1985 WEST-TEC PX CALC I (engineering sample)
- COPYRIGHT 1986 WEST-TEC PX-1200 CALC A (Siemens)
- COPYRIGHT 1986 WEST-TEC PX-1200 CRYPT A (PX-1200E)
- COPYRIGHT 1986 WEST-TEC PX CRYPT KD (Ericsson)
- COPYRIGHT 1987 WEST-TEC PX-1100 CRYPT A (development version)
- COPYRIGHT 1988 WEST-TEC PX1000S/A (Commex, Teli Contact version)
|
In the same way as the firmware version can be read (see above),
it is possible to test the memory of the device. Use the following
key combination whilst the device is running. If there are no
memory problems found, the display will show 'MEMORY OK'.
|
|
|
Built-in self test
ZEROIZE
|
 |
|
|
In software version V2 and later (i.e. from 1984 onwards) some additional
self-test facilities have been built into the PX-1000. Below is an overview
of the key combinations that should be used to activate the self-test.
Hold down ON/STOP, then press the letter key, then release ON/STOP.
This key combination is equivalent to a cold start of the PX-1000.
The device behaves like it is switched on for the first time.
Text memory is cleared and a copyright messages displays the software version,
whilst the device performs a self-test. For crypto-aware users, this
key combination can also be used as a ZEROIZE function.
The following responses are possible:
|
- One beep and one LED flash
All tests OK.
- Two beeps and two LED flashes
RAM test was successful, but the LCD is faulty.
- Three beeps and three LED flashes
The unit tries to write and then read back each memory location,
including the locations needed by the program itself. This error indicates
that it does not read back what it has written to some (or all) memory locations.
|
When activated, the key combination D + ON/STOP causes the LCD to be cleared,
whilst the modem transmits a continuous mark/space signal at 1200 baud
without a header. This signal can be useful when adjusting the
input signal with potentiometer P2 on the logic board of another unit.
The signal can be stopped again by pressing the ON/STOP key.
This key combination causes the display to be cleared, whilst the modem
transmits a continuous mark signal for 10 seconds, followed by a
10 second space signal, each time without a header. It can be used
to check the quality of the modem output (i.e. amplitude and frequency).
The signal can be stopped again by pressing the ON/STOP key.
This test performs a WRITE/READ operation on each location of the
text area (in RAM). If the test is successfully conpleted, the text
'MEMORY OK' will appear on the display. If one or more memory locations
are faulty, the display will shows 'MEMORY ERROR'.
In addition, the 1988 version of the firmware (e.g. TELI Contact)
supports the following key combinations:
|
 |
The the beep (key click) on or off.
|
 |
Enter CALC mode.
|
 |
Clears all previously converted character codes.
|
 |
Switch line and text numbers ON or OFF.
|
 |
Switch the PX-1000 off.
|
 |
Display the number of free bytes in memory.
|
 |
Display the unit's software version (without self-test).
|
 |
Perform a display test.
|
 |
Receive text via serial port at 1200 baud, regardless of header.
|
 |
Remove empty files between used files.
|
 |
Insert empty file between used files.
|
|
Each PX-1000 terminal has a built-in
RS-232 serial port which is combined with
the power connector at the left. The RS-232 connection allows the matching
PXP-40 printer to be connected at the left hand side.
Power is then connected to the rear of the printer.
|
The PXP-40 is a small 40 column thermal printer, roughly about
3/4 of the width of the PX-1000. It is
inserted into a slot at the left side
of the terminal and can be released again
by pressing the two release buttons.
When unused, it is stored in its
transit case.
The image on the right shows a Philips-branded PXP-40 printer,
loaded with a paper roll. Paper can be transported manually by rotating
a rigged knob at the left.
Paper is loaded from the rear and the roll
simply rests inside its bay,
with no axle to hold it in place.
|
|
|
Further images of the PXP-40 in use, below in the thumbnails.
Click any of them to enlarge. The last two images show how the two
release buttons (one at the front and one at the rear) have to be
pressed simultaneously in order to
remove the printer from the PX-1000 again.
It was also possible to use the PX-1000 with a different type of
printer. By using a 3 mm Jack-to-DB25 cable,
any suitable printer with a serial port could be used.
|
- Data rate: 300, 600 or 1200 baud
- Data format: 7E2 (7 data bits, even parity, 2 stop bits)
- Power: 12V DC via external adapter
- Display: Single line monochrome LCD
- Memory: 7400 characters
- Modem: simplex
|
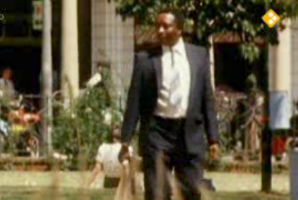
On 11 February 1990, black activist Nelson Mandela was released from prison,
after serving nearly 28 years of his life-time sentence.
Mandela was the leader of the South African political organization ANC
(African National Congress).
During his imprisonment, many people from all over the world fought for his
release and for the abolishment of Apartheid.
|
In 1986, a secret operation led by then-ANC intelligence officer
Mac Maharaj was mounted, to smuggle freedom fighters back into the
country and prepare Mandela for his speculated release, known as
Operation Vula [2] (Eng: commence).
The Dutch contribution to Operation Vula was led by Connie Braam,
then head of the Dutch anti-apartheids movement.
Her work involved finding professional makeup artists for making
disguises, a stewardess acting as a courier and, last but not least,
a modified Philips PX-1000 that was used to exchange messages
via London with Mandela in his Pollsmoor prison cell.
|
|
|
On 11 February 2010, the Dutch TV program Andere Tijden, aired a
25 minute special about Operation Vula [3]. In the interview,
Connie Braam explains how she contacted an engineer who worked for
Philips at the time. He suggested the PX-1000 for secure communication,
which was subsequently used to send messages to Nelson Mandela
via Amsterdam and London.
According to Braam, the system functioned well and was used throughout
the entire operation. Tim Jenkin however, the ANC's London-based
communications expert, tells a slightly different story [8].
According to him, the system worked well, except over the bad
South-African telephone lines, for which they used another system,
based on early home computers and external modems.
The latter system was developed by Jenkin himself and needed
cryptographic keys that were distributed on floppy discs. The discs
were smuggled into South-Africa by 'Antoinette', a KLM stuardess
who had been recruted by Conny Braam. During operation Vula,
London acted as the central communications hub, with links
to Lusaka, South-Africa and The Netherlands. It is entirely
possible however, that the PX-1000 was kept in use for the
Amsterdam-London link.
Once in South-Africa, the messages were smuggled in and out of
Mandela's prison cell by his lawyer, using concealed compartments
in book covers. It allowed Mandela to communicate with the ANC key
people in Lusaka and lead the negotiations with the South-African
government. It also ensured that he was well-informed on the day of
his release from prison in February 1990. After the first multiracial
elections of 1994, he became South-Africa's first black president [13].
|
The PX-1000 was extremely well built for its time. It was also very compact and
light weight, which made it ideal for portable applications. It was among the
first devices to use an advanced microcontroller with integrated memory and I/O:
the Hitachi HD6303RP.
|
The image on the right shows the PCB inside the PX-1000. The small
circuit board is very well layed out and carries the
processor (in DP-40 packaging) right at the center.
The controller is compatible with the Motorola 6800 series,
and has a built-in serial interface (SCI), parallel I/O,
timers and 128 bytes of RAM.
Memory is further extended by using a HM6264 external static RAM (right).
This adds 8KB of RAM to the design, 7.4KB of which is available for storing
the text messages.
The software is stored in an 8KB EPROM (left of the RAM).
|
|
|
The modem of the PX-1000 is implemented as so-called
thick film circuit.
It consists of a number of SMD components (transistors, diodes)
and vapor deposited resistors, on a white ceramic substrate. It has two
rows of pins, one at either side, for connection to the motherboard.
In the image above, the thick film circuit is located on the left half of the PCB.
A separate audio pre-amplifier (Toshiba TA7330P),
with automatic level control (ALC), is present to the left of the thick
film circuit, in between the two potentiometers [6].
|
Inside the PX-1000 are 5 Varta 170 DK NiCd battery cells. As each NiCd cell
has a nominal voltage of 1.2V, the PX-1000 is normally powered by 6V DC.
As the PX-1000 was built somewhere around 1985, the NiCd batteries of most
of the surviving devices will have died by now. Furthermore, NiCd batteries
have the tendency to start leaking after so many years, causing permanent
damage to the interior of the PX-1000. This is clearly visible below.
|
If you want to bring an old PX-1000 back to life, you first need to remove
the old batteries and clean the interior. Next, you'll need to examine any
damage caused by the leaking batteries and repair that if possible.
Finally, you need to find a suitable replacement for the batteries.
One possibility is to bring the wires out, and feed the PX-1000 with an
external 6V DC power supply.
A better solution however, is to replace the 5 cells by the newer
Varta V250H NiMH cells.
These cells have been designed especially to replace the old 170DK NiCd
cells.
|
|
|
Replacing the cells is a clean solution that doesn't require any
modifications to the PX-1000 itself. One has to bear in mind though,
that the replaced batteries should be used (discharged) and charged
regularly, in order to keep them healthy. The is also true for the PXP-40
printer.
|
The image on the right shows what happens to the interior of the PXP-40
printer, once the batteries start leaking. In this case, the swollen batteries
have caused permament damage to the printer mechanism. The leaking batteries
have also caused corrosion to the main PCB.
The PXP-40 is powered by 7.2V. The 6 NiCd cells of 1.2V each, are bound
together as a pack, positioned aside the printing mechanism on top of the
PCB. They pack is connected to the main PCB by 2 wires that also keep it
in place. The batteries are easily replaced.
|
|
|
Bringing a PXP-40 printer back to life, might be a bit more work than getting
a PX-1000 to work. As the batteries are located aside the printing mechnism,
the cog wheels are easily damaged by the swollen batteries. Careful cleaning
and reparing of the broken parts will often be necessary to bring the PXP-40
back to life.
Leaking batteries may also cause secundary damage to the PCB. As a result
of the swollen batteries, the cog wheel mechanism can be blocked, causing
excessive currents in the motor driving electronics. This may cause a
56 ohm safety resistor on the PCB to break.
|
The PX-1000 was supplied with its own transit case, a mains power adapter
and a manual, stored in a rectangular carton box with a photograph of
the device on the sleeve. Inside the box was a polystyrene placeholder
with a layer of dark blue artificial velvet (see below).
|
The packaging could be tailored for each reseller,
but always contained the TEXT TELL logo.
There were small differences in the typeface
and in the text printed on the carton.
The image on the right shows the packaging of the Philips
PX-1000Cr. It contains the Philips brand name in the
top right corner and the TEXT TELL logo at the bottom.
Other (but similar) cartons can be found in the thumbnails below.
|
|
|
|
The Text-Tell PX-1000 under various brand names. The following names
are currently known:
|
- Text-Tell
- Text-Lite
- Philips
- Siemens
- Alcatel
- Commex, Teli Contact
- Family Doctor
- Ericsson
|
- Text Tell Ltd. 1
7 Montpelier Parade
Monkstown Road, Blackrock
Co Dublin
Ireland
- Text Lite BV (1985) 1
Corn. Schuytstraat 74
1071 JL Amsterdam
The Netherlands
|
-
These addresses are no longer valid.
|
Our call for documentation of the PX-1000 in mid-2011 has generated a new flow
of information about this device. The original user instructions were found
rather quickly, but we were really surprised when we received the original
service manual and the circuit diagrams. We've now made them available for
download below in the hope that they may prove useful when repairing a broken
PX-1000. Many thanks to all who have contributed.
If you use the documentation, please consider making a
donation to Crypto Museum.
|
- Philips Nederland BV, PX-1000 Brochure
8-Page full-colour brochure (Dutch). Probably 1985.
- Philips Nederland BV, PX-1000 Handleiding
User Manual (Dutch). 29 pages, A5 size, B/W. April 1985.
- Text Tell Ltd, PX-1000 Operating Instructions
User Manual (English). 19 pages, A5 size, B/W. 1985.
- PX-1000 and PXP-40 Service Manual
Full circuit description of version H. 61 pages, A4 size, B/W.
- PX-1000 Circuit Diagrams
Version F and H. 4 pages, A3 size, B/W. 1985.
|
- Cees Jansen (former cryptographer at Philips Usfa/Crypto)
Interview at Crypto Museum, August 2011.
- Noseweek, Zuma, SARS and Kebble: The Political Agenda
Issue 69. 1 July 2005.
- Andere Tijden, The Making of Nelson Mandela.
TV program by NPS, VPRO. 11 February 2010. 25'24" (Dutch).
- WayBack Machine, www.texttell.com
Internet archive, showing the state of the Text Tell website in 2001.
- Hitachi, HD6303RP microprocessor datasheet
- Toshiba, TA7330P pre-amplifier datasheet
Pre-amplifier with ALC circuit for mini/micro cassette tape recorder.
- Philips Nederland, Philips PX 1000 Handleiding
Manual for the Philips PX-1000 and PX-1000Cr (Dutch).
- Tim Jenkin, Talking to Vula
The story of the Secret Underground Communications Network of Operation Vula.
ANC website. ANC's Montly Journal Mayibuye, May 1995 - October 1995.
- US Patent D282164, Portable Telex case or the like
Filed 17 Oct 1983 on behalf of Text Lite BV. Granted 14 Jan 1986.
- Onkruit, De klanten van Philips Crypto
The customers of Philips Crypto (Dutch). June 1992.
Documents captured by activist Kees Koning after breaking into
the offices of Philips Usfa.
- Hugo Krop, Personal correspondence and interview
Former director of Text Lite BV.
Crypto Museum, 25 August 2013, 15 December 2013.
- Conny Braam, Operatie Vula
1992, Dutch. ISBN 978-9029083362. p. 66.
Reprinted 2006, Dutch. ISBN 978-9045700465.
English version 'Operation Vula', April 2005, ISBN 978-1919931708.
- Wikipedia, Nelson Mandela
Retrieved November 2013.
|
|
|
|
Any links shown in red are currently unavailable.
If you like this website, why not make a donation?
© Copyright 2009-2013, Paul Reuvers & Marc Simons. Last changed: Wednesday, 16 July 2014 - 12:02 CET
|
 |

|
|

![Philips PX-1000Cr, courtesy Cees Jansen [1]](img/301282/000/full.jpg "Philips PX-1000Cr, courtesy Cees Jansen [1]")


")


")


")


")

")


")


